Saturday, 14 June 2014

A start to my daughter's Auntie Green

The original antique quilt was made by Mary Anne Wellen (Auntie Green) in 1860 in London and passed down to her Australian family. There are large photos in this magnificent book The Fabric of Society - Australia's Quilt Heritage from Convict Times to 1960 by Annette Gero. I have done much perusing...


Irene Blanck's pattern is a lovely version of the quilt - finishing at 90" by 78". I was so thrilled when this pattern was first released and bought it straight away. It has been on The To Do List  for a while and I 've watched  Carole's version growing beautifully. 

My quilt will be based on Irene's pattern but I will make a little tweak here and there - just when I might want to follow the original antique more closely. Here is Irene's pattern: 

Starting with the centre panel:
 I decided to go with a basket similar to the antique in the book pictures.  I just love lattice baskets/vases and I have appliqued a few of these in the past on some Baltimore blocks ( still not finished ).

So I sketched one here - a bit simpler than the antique - to place on top of (and blend with) Irene's pattern.

I made a few 1/4" bias strips and wove them in place...ready to hand applique.


Pretty happy with how that looks so selected fabrics for stem bias too...

I knew this neutral colour palette would be difficult to photograph - it is not a grey background - more of a warm cream but the lighting was not good for those photos! The background fabric is Kona Ivory.

A couple more photos of the centre applique coming along...and different lighting, looking a different colour again ..grrr. Starting some needleturn applique leaves and flowers. 


Benjamin Biggs Block 6 is done. I used the same fabric for the berries as in Block 3 - with fussy cut centres again. 
The background for these blocks is Kona Ivory - the same as for Auntie Green - though you might not know it looking at the photos above!
While I have been blogging it has gone from rain and solid cloud cover .....to brilliant sunshine. Time for a brisk winter walk I'm thinking! 

Monday, 9 June 2014

Ann Randoll reproduction update

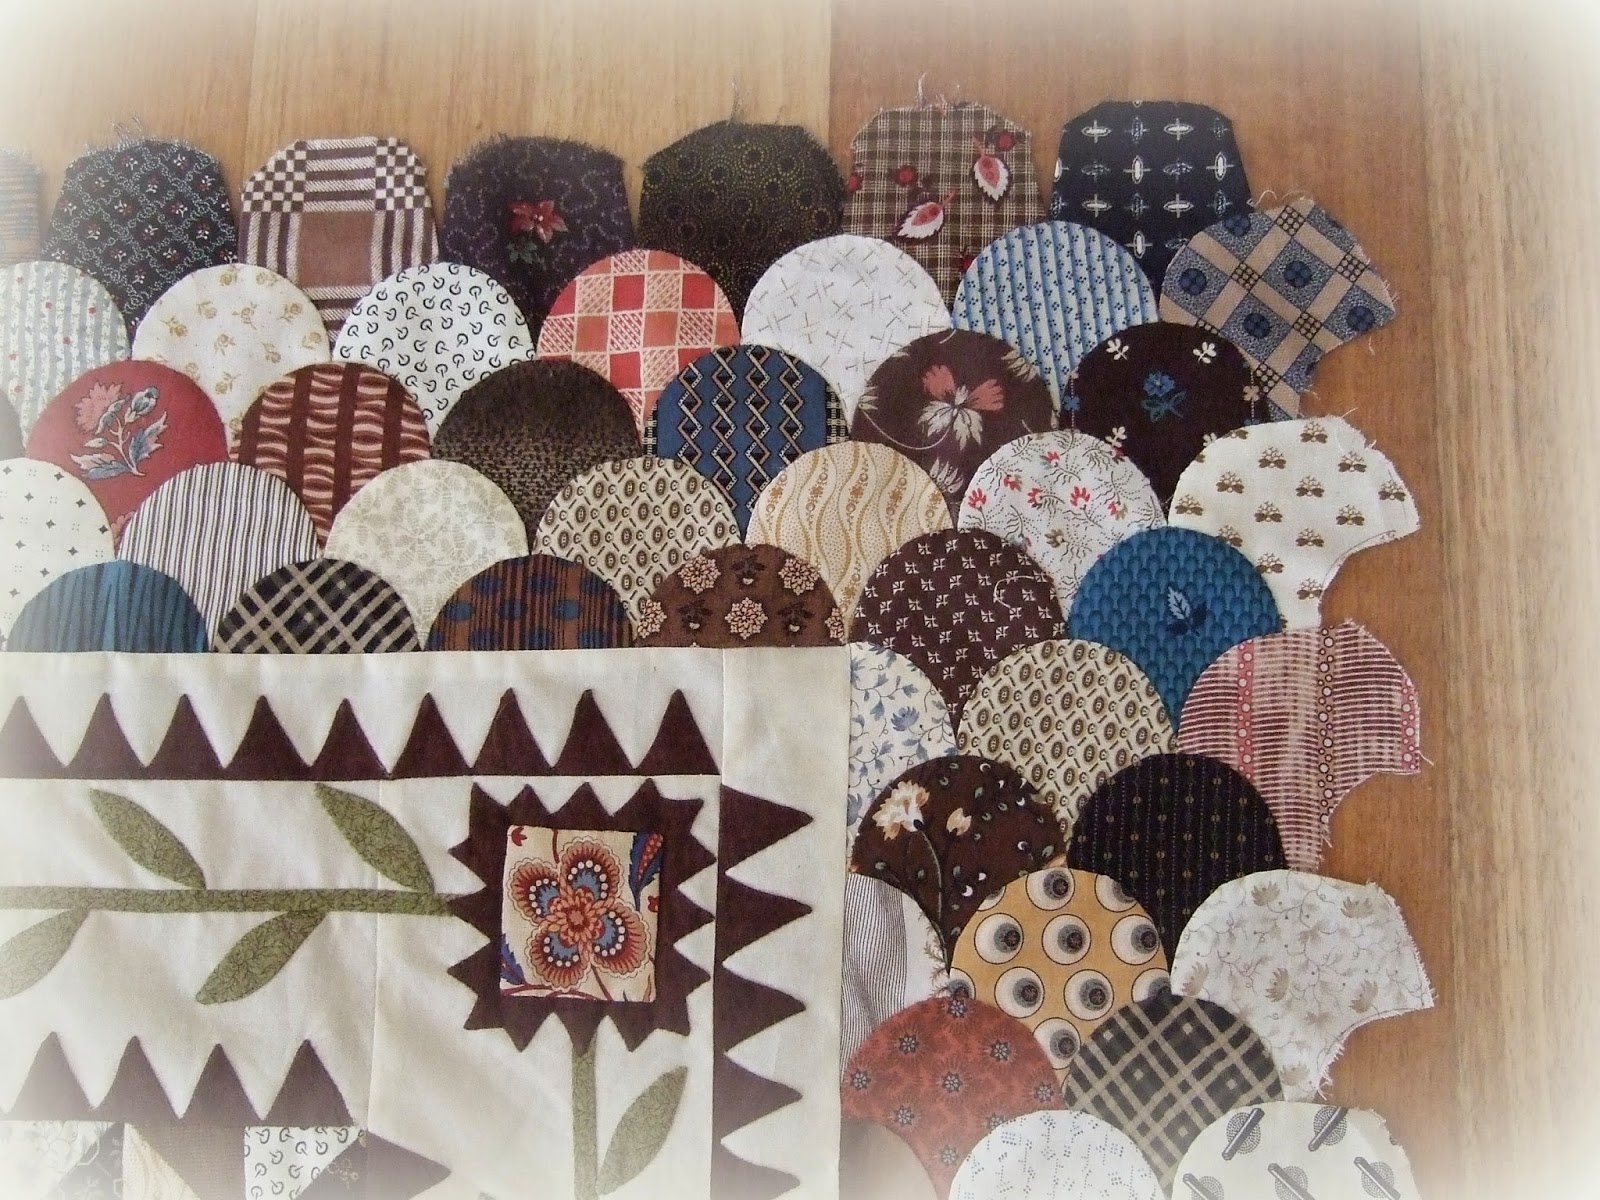
The clamshell borders are on and here's how it looks now:
Now measures about 68" square

I've decided to keep my quilt square in shape - partly because I prefer the look of it, and partly to keep it a more manageable size.  So my clamshell border is narrower top and bottom than the original antique quilt. I have been working from Rhonda Pearce's workshop pattern. She made the wide clamshell border like the original. I think/hope to be able to modify the next border to suit a square shape. Just a reminder - here is a picture of the antique quilt:
Photo from book Quilts 1700-2010  from the V&A
And here are some more photos of the final stages of attaching my clamshell borders. Each border consists of clams entirely hand stitched together- which makes it a bit fragile. So it was a relief to stitch each strip to the quilt - anchored securely with a line of machine stitching.


In the border corners - overlapping the clamshells to fit them together

Ready to hand applique the corner clamshells together, and then remove the last of the papers.

All corners completed:

Hope everyone is getting lots of extra stitching time this long weekend (Queen's Birthday long weekend in Australia). I've been busy garden tidying and have the aching shoulders to prove it. So today there should be some lovely quiet time working on the start of Auntie Green - will post soon. 

Here are the last of my geranium flowers - rescued before I gave the plants a severe winter trimming. Amazing burst of colour!

Monday, 2 June 2014

New month ...new project

New month,  and I am happy to say there are no quilting misadventures to report in this post. Last two posts there were a few 'confession's but I'm (hopefully) over that.

A sure sign of better things -  I received a little parcel from Susan at Thimblestitch  - a win in her giveaway - so beautifully stitched and just what I need for small applique pins!

And I am borrowing Susan's idea of showing my 'family' of pincushions - with the new addition getting friendly with its lumpy cousins. Thanks Susan!

And the New Project?
My newly-engaged daughter spent the day here on Saturday. We had an appointment for her to try wedding dresses....beautiful, vintage-inspired gowns. I don't need to tell any of you mothers of daughters how that felt! or how she looked! 
We also spent time planning the quilt I am making for her wedding (in around 10 months time). She wants very low volume and largely shades of cream and beige. Here are the fabrics she selected from my stash - some plain but a lot have a subtle design or toile. 
And this is the pattern I will use - Auntie Green - Irene Blanck's lovely pattern - all hand applique. 


This design will be very muted in these colours - but she is hoping it may draw you in for a close inspection (squinting through your glasses?) We are thinking that once it is quilted - with outline quilting for emphasis around every shape - the pattern may stand out better and have the overall look of two-tone vintage lace.  
The backing of the quilt will be a plain cream homespun so, once quilted in this way, will look like a whole cloth quilt from the back. The quilt could be used either side up.
I've not done anything like this before but am quite excited to give it a try. And the beauty of lots of scraps of applique is that we could adjust the colour choices as it goes - a bit more or a bit less contrast. So that's the theory....wish me luck.

Ann Randoll progress
The clamshell border is growing steadily. I have used Sue Daley's method of constructing clamshells. It is one of several possible ways to make clamshells, not necessarily the best way - just the way I have found that works very well for me. It does involve glue so I am prepared to give this quilt a good wash.


Clamshells glue-basted ready to applique together in rows
I drew up a grid on paper - just to make sure my rows were staying in line.

One border ready for a photo - papers removed

Clamshell side border sewn to the quilt
Benjamin Biggs  - Block 6 pattern has just been released and ...even more exciting - the border too. I have just printed the 13 pages of this installment and can't wait to get started. 
I see a great deal of applique in my future ... oh goodie!

And what does this photo signify?

I have two quilts accepted to go in the NSW quilt show - in Sydney in July. They are Carolina Lily and Star Bouquet . It is the first time I have entered any Show and I am a bit ambivalent about it. Technically my quilts are far from the superb standard of so many I have seen in the Sydney Show. But I wouldn't mind hearing just which areas need most work. So I entered them for judging - hoping there would be feedback given. I've since heard that doesn't happen. Oh well - I think it is an achievement to have been accepted to exhibit and my family is very excited (much too excited actually!) 

Saturday, 24 May 2014

A finish, a wash and "oh no...the chintz!"

This week I finished the machine quilting on my chintz panel medallion quilt, added a blue ombre stripe binding and popped it in the machine for a gentle, cold wash. And my thoughts as I saw it emerging from the machine at the end of the wash? 
"oh no ...the chintz!" - the lovely chintz centre panel has lost much of its colour - so sad! The rest of the fabrics are as fresh as ever - only the chintz suffered.
Here is the quilt finished and washed :

Finished at 186cm square (73 inches)
My first thought (coward at heart) was to hide it away never to be mentioned on the blog again! 
But , to be philosophical, the chintz has now lost its "youthful bloom" but it is still a pretty piece of fabric and has a vintage look that deserves to be loved. So here are more photos. 
This is the panel at the time of pin basting - bright and beautiful before the wash:

Thankfully the colour catchers grabbed all the lost colour so it didn't end up streaky. 
Colour catchers after the wash

To fill you in on the quilting:
I deliberated for ages on how to quilt that centre panel and even made a pattern sheet to practise sketching possible quilting patterns. 

I did toy with feathers in the cream ring but the variable width of the cream area made it a challenge to fit neatly and I didn't like the look of it. I decided to go with something different  - shapes to echo the applique shapes in one of the borders. Other quilting on the panel is some background stippling, a 1" grid and a wreath.

After washing 
The quilting on the borders includes a clam shell filler, a wreath, outlining, and straight stitching. 
Quilting on the borders 


A view of the backing 
(Just in case you ask - I have contacted the retailer where I bought the chintz panel and they have been quick to reply and sympathetic but have not heard of this problem before.)

Here is Benjamin Biggs Block 5 completed.

Have a lovely weekend

Sunday, 11 May 2014

Considering clamshells...

Here is the start of the clamshell border on my Ann Randoll repro quilt. I am very keen to reproduce the colours/look of the original fabrics because that is, for me, a major attraction in the old quilt. Luckily there are wonderful closeup photos of the clamshells available in the book"Quilts 1700-2010" by the V&A - just love this double page photo spread ! 
Starting to select fabric from the stash
Rhonda Pearce provided 2 1/2 " clamshell papers in her workshop back in January. I made a plastic cutting template to suit.
Here is a selection of clamshells cut out ready for prep - this will do for a start to see how it looks...
I generally cut as I go with EPP - modifying fabric choices depending on how it looks as it grows.

And then there are clamshells to consider in my Medallion quilt too - in the quilting. 
I have not given the quilting much attention for a few weeks. I dithered  considering what to do in the zigzag border for a long time - very tempted to do something relatively easy like straight lines with the walking foot. But yesterday I had a moment of madness and decided to do some free motion clamshells. They're not too "free" as I have a template to draw on first! I am using a thread colour to match the fabric so the machine stitching does not stand out - hoping as always to mimic a hand-stitched look in the end. 

Talking of hand quilting...I pulled out my very first quilt - a sampler made in 1990 - just to remind me of the feel/look of hand quilting. I remember how the quilting bug bit when I started hand quilting it - just loved it. Of course it is very wonky (nowhere near square) and the quilting is not evenly spread...but at least you can see I was keen! I do love the crinkly, soft old texture of it.  


My second quilt (below), finished 1992, was on the bed for years when the kids were growing up. I have just gifted it to my DD and her fiance for their engagement. They said "no gifts" but this is just a sentimental gesture. I must have exhausted myself on all that hand stippling on the sampler above because this second quilt is hand quilted - but only very lightly. Might have been something to do with having a toddler and little/no time - it is a huge quilt!

I tried it on the bed to make sure it still looked usable after all these years.
Folded double


I finished the secret knitting and can now reveal the gift.

I'm off to Mother's Day lunch - being treated to a restaurant meal. Not that I mind cooking...
                            Hope all you mums have a fabulous day!